Quick Easy Popsickle Stick Ornament Craft for Scuts

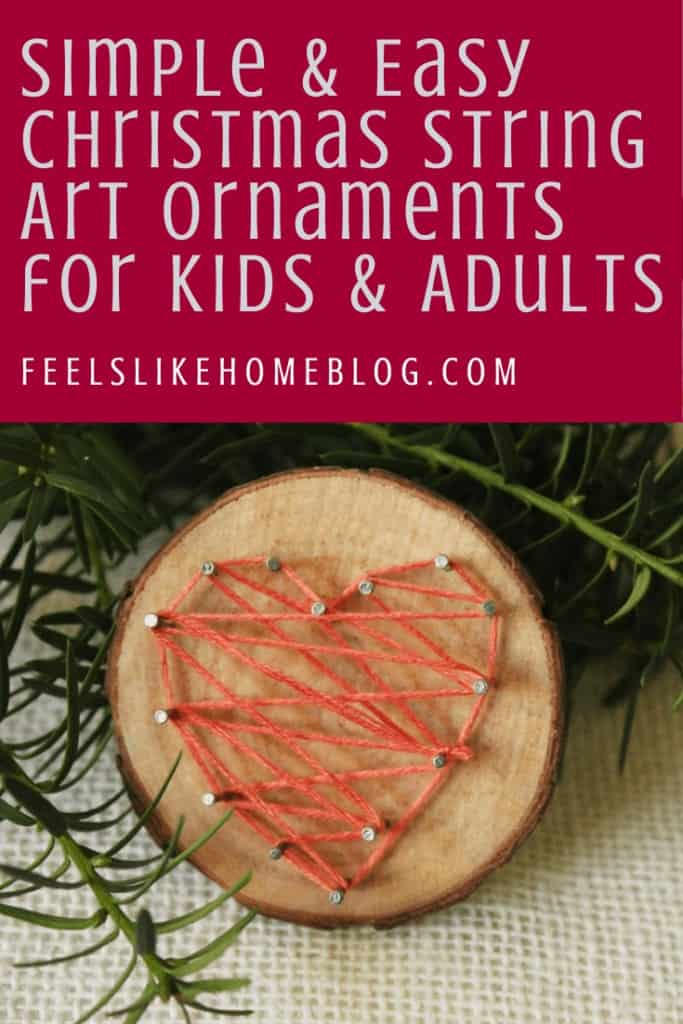

Christmas String Art for Beginners
A couple of months ago, I shared my foibles at learning string art. There are lots of good tips for beginners in that post, so check it out especially if you're new to the craft.
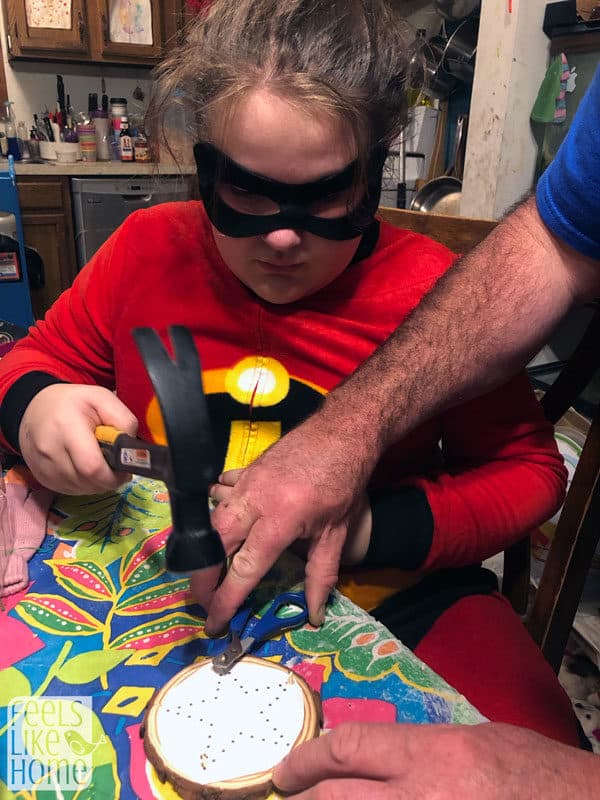
Now that I've figured out string art (mostly), I am really into creating little projects, and I decided to do these simple and easy Christmas ornaments with my tween Girl Scout troop. We haven't done them yet, but I did help both 11-year-old Grace and almost 8-year-old Allie each to make one, and they were both successful, so I have high hopes for my 11 and 12-year-old scouts. We'll see.
I've seen others on Pinterest who did similar projects with kids as young as 4 or 5, and that may be possible, but I wouldn't try it with kids much younger than Allie. Her attention span was short, and she didn't want to do the hammering at all, but it was great fine motor skills practice for her little fingers, so I think it was worthwhile.
Okay, so here's the gist of these ornaments:
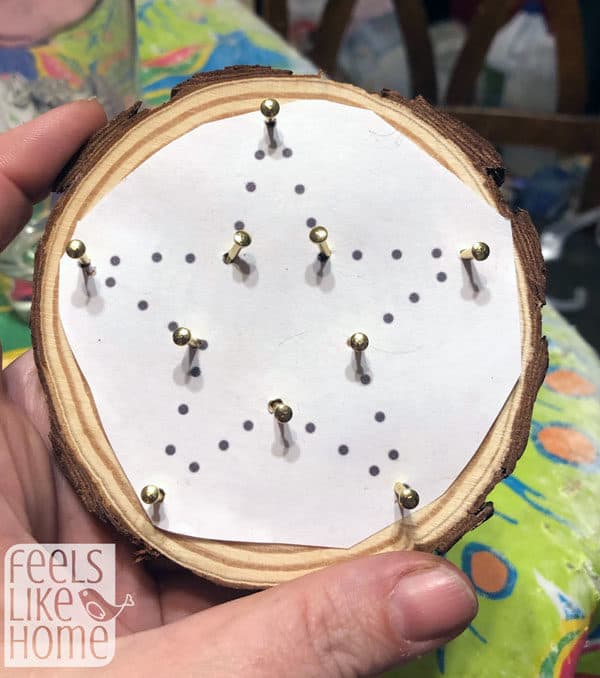
- Cut the pattern out and lay on the wood slice (tape in place if needed).
- Hammer nails into the pattern, approximately at the dots, but not at all the dots if you are using a 3-4" wood slice.
- Rip the pattern off.
- Wrap string around the nails in your desired pattern.
- Screw in eye for hanging.
That's it. This is a very simple and easy, though not very quick, project.
You could certainly cut your own wood slices for this project, and I recommend recycling your Christmas tree trunk if you have one (and it's got a big enough diameter - never having had a live tree, I'm not sure how big the trunks are), but in general, the slices you can buy from Amazon or Etsy are more uniform and both smoother and straighter than ones you or your handy hubby would cut. That said, there is something charming and rustic about imperfect ones, so if that's your thing, have at it.
Wood Slice String Art Christmas Ornament Materials
- Wood slices - I used these 3.5" slices from Amazon because they were cheap, but if you were getting rid of your Christmas tree at the end of the season, you could very easily cut slices off the bottom of that.
- 1" nails - These are the perfect size - relatively short with a medium head that holds the thread in place.
- Hammer
- Painters tape (optional, we didn't use this but would be helpful especially for younger kids)
- Screw-in eyes - Honestly, these tiny ones were a pain, but I started with much larger ones and they split my wood as you will see below. We ended up using long-nose flat jewelry pliers to screw the tiny ones in, but at least they didn't split the wood like the big ones did.
- String or friendship thread (received this free from craftprojectideas.com)
Wood Slice String Art Christmas Ornaments Instructions
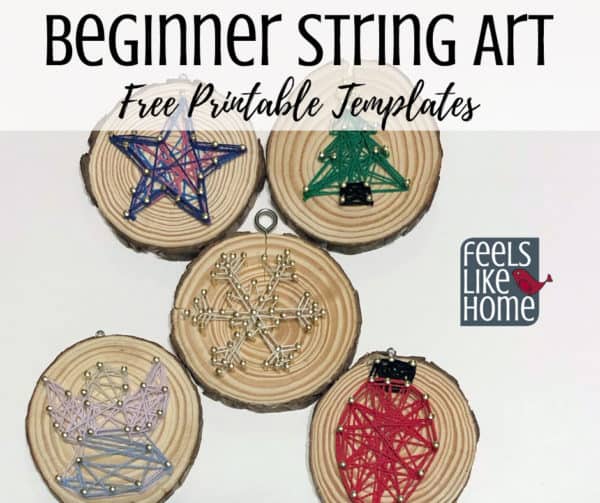
- Save and print the patterns.You won't be able to reuse it; you will have to print multiple copies.
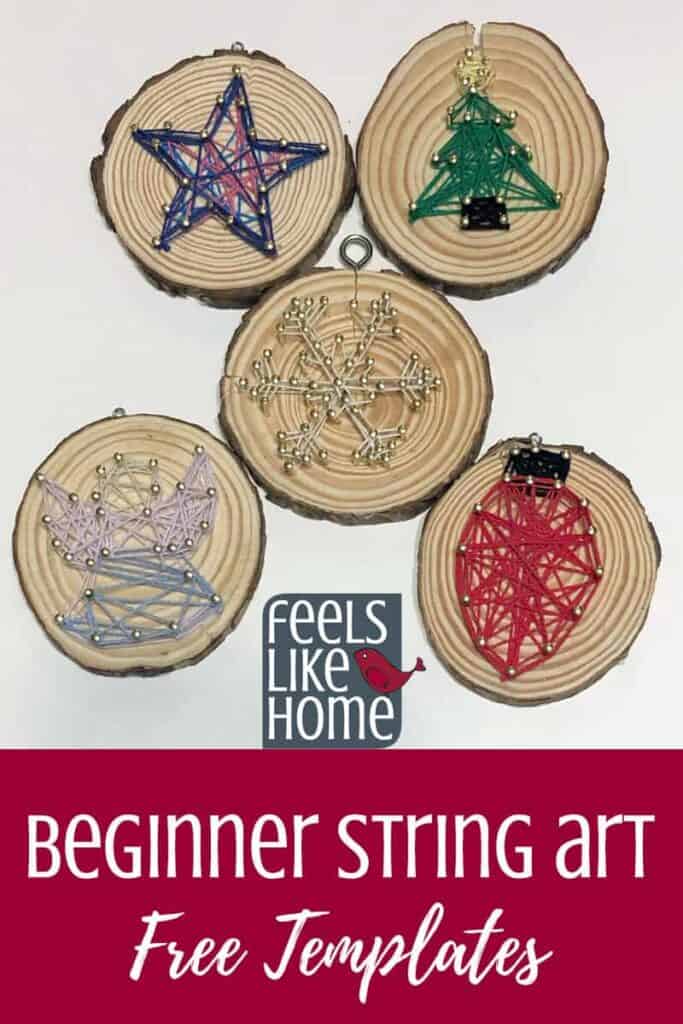
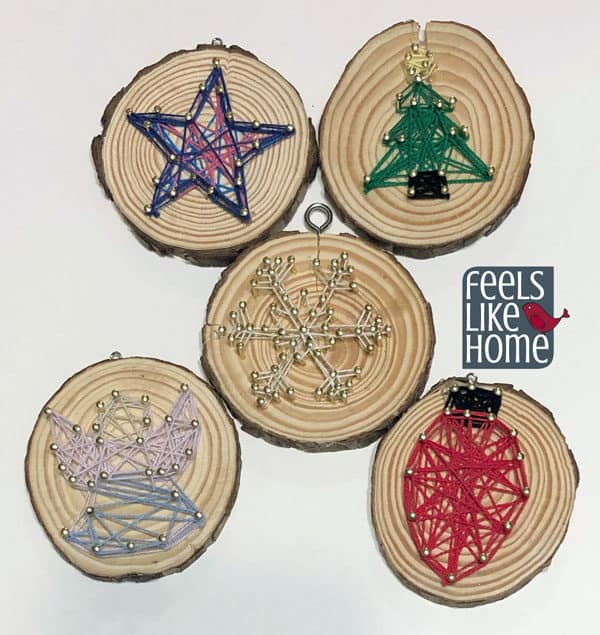
I have included eight different patterns on my two pattern sheets:- Star
- Snowflake
- Christmas Tree
- Christmas Light
- Angel
- Christmas Bow
- Candy Cane
- Heart
Cut the shape you want out of the pattern sheet. There is no need to be precise in the cutting; a blob around it will be good enough.
2. Tape the pattern in place, if desired. I would definitely tape it down if working with younger children, but it's not really necessary if an adult is standing by to hold the pattern (and you should be, for sure, even with older kids like Grace below).

3. Help the child to hold the nails in place while she hammers them in. Our cat nail clippers were perfect for this task as they have a curved hole and handles. They are also very cheap (under $4) in case we ruined them which we did not.
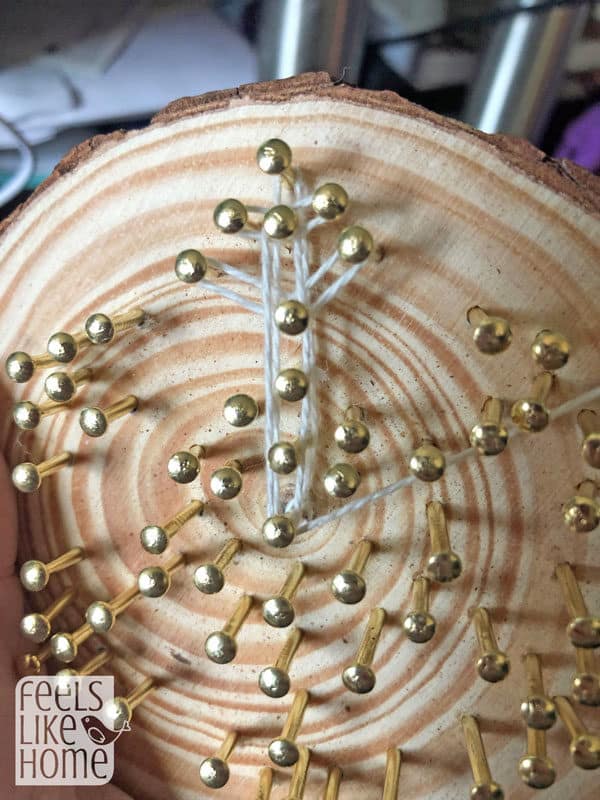
4. Do not attempt to add a nail at every single dot on the template, except on the snowflake, and even then, you can eliminate a couple of the cross pieces. For the star below, Grace initially only used the outside and inside points, but then she changed her mind and added one extra nail on each flat side of the star.
Note: If you blow these templates up by using the scale function on your printer, you would probably want to include more of the nail dots, but at the 3-4 inch scale I intended them for, I included way too many dots to be reasonable. But then, I didn't feel like going back and remaking all the templates so I left in the extra dots. Sorry to be confusing.
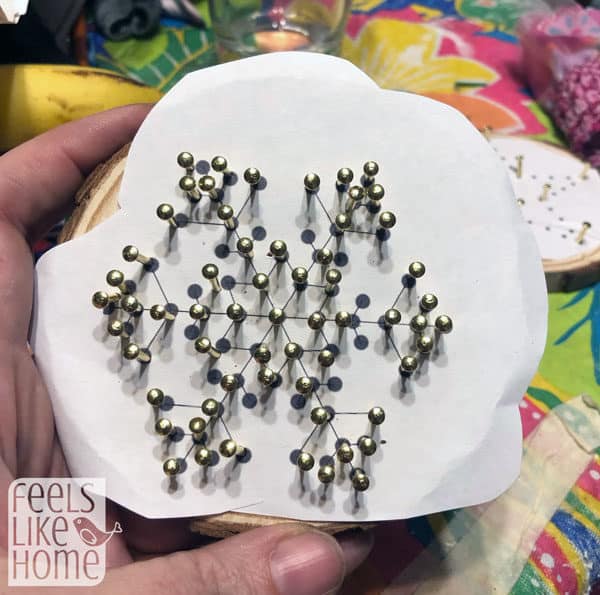
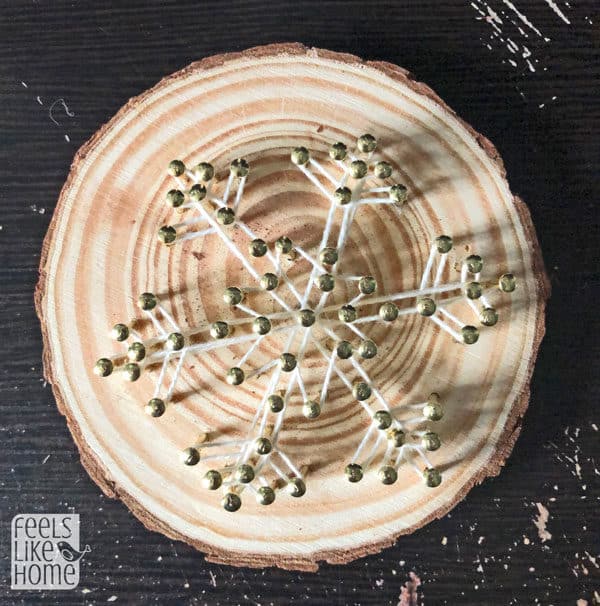
5. This is what my snowflake looked like. If I were doing it again, I think I would leave out the cross pieces near the end of each leg of the snowflake. Those nails were too close to the leg to really show.
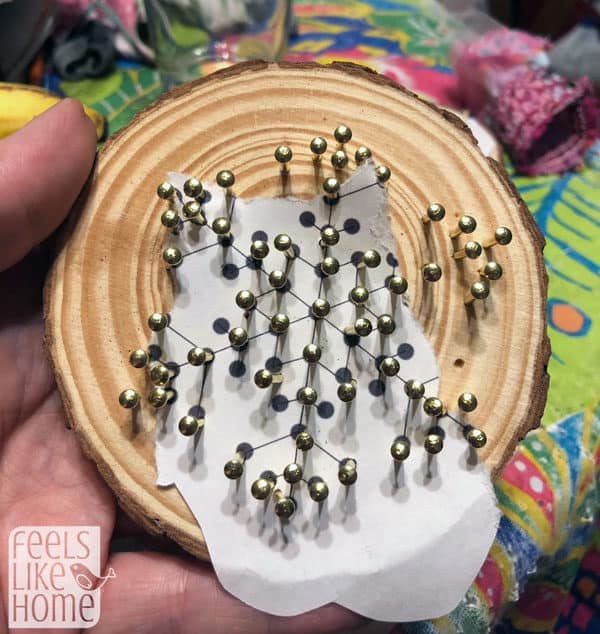
6. Rip off the pattern. You cannot save it for reuse later unless you are very, very careful.
I am not, so I just printed the patterns multiple times.
7. Tie a knot around one of the nails and trim the end of the thread close, but not so close that your knot falls out. If this knot comes out, your entire project will unravel. You may want to add a drop of super glue to the knot, just to be extra cautious.
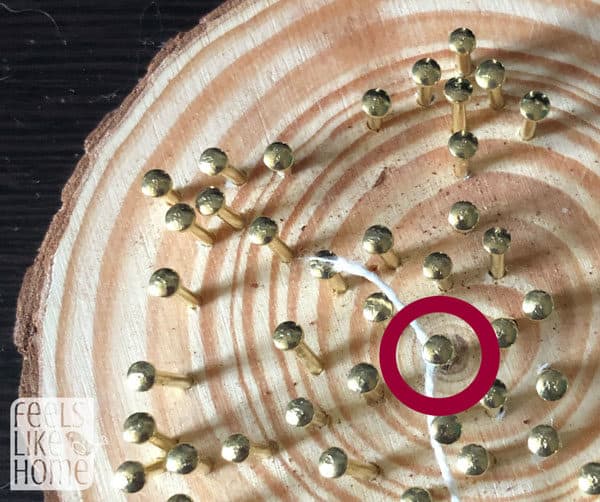
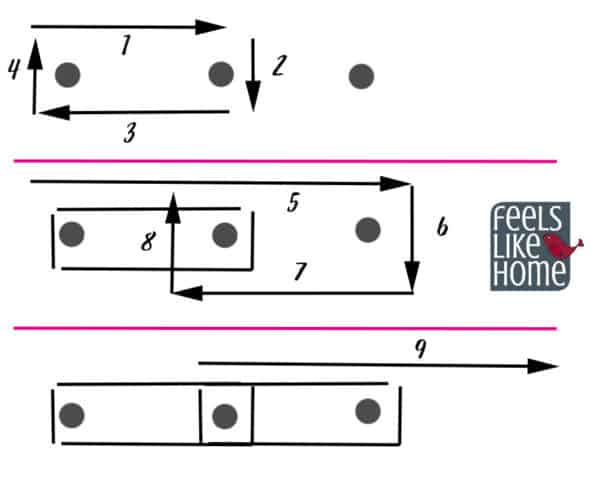
8. Wrap the thread around the nails. You will want to make an outline either at the very beginning or very ending of the project. I have included a diagram of how to make the outline below.
For the snowflake, I only did an outline because there weren't really any large areas to fill in. For all the other shapes, I did an outline and then wrapped the thread back and forth across the larger areas to fill in. You'll see what I mean below in the finished projects.
Here's what I mean for the outline. It's sort of like a running stitch in sewing, if you're familiar with that.
9. Here's my finished snowflake with the outline. If you don't like this look, you could cross over the outline on each nail, but make sure you do every single "stitch" the same way or it will look wonky.
10. Screw in an eye at the top, add a length of thread for a hanger, and you're done. Easy peasy.
The star below is what Grace made. I never would have thought to layer multiple colors, but I love the way it turned out especially with the bright colors.

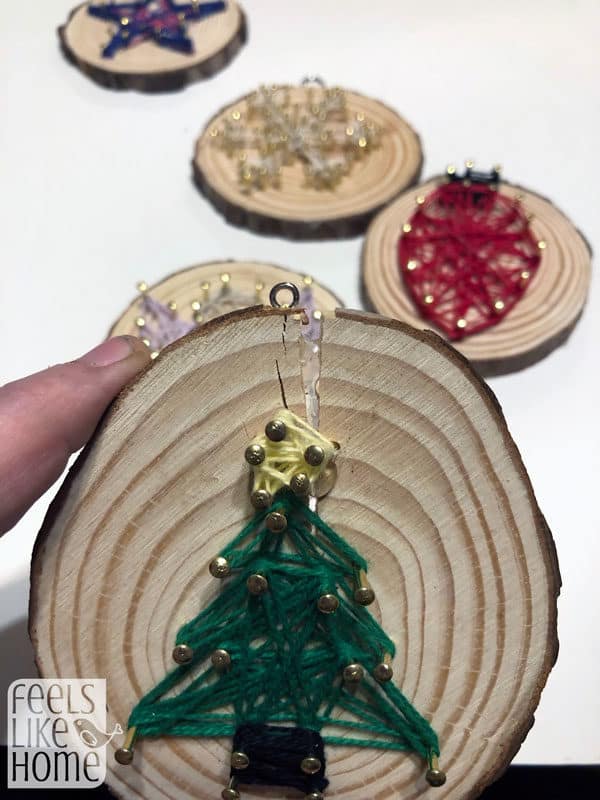
This Christmas tree was the first one I screwed the larger eye into, and it split the wood right down the middle. Then the screw eye fell out which was a bummer. I ended up putting hot glue into the split to save the design, but I don't know if it will last long term or not. The smaller eyes did not split the wood.
You can see what I mean about filling in the larger areas in the Christmas tree. When you work the tree, pay close attention to where the thread should NOT be - if you fill in too much on the sides, you will lose the nice tiered shape of the tree.
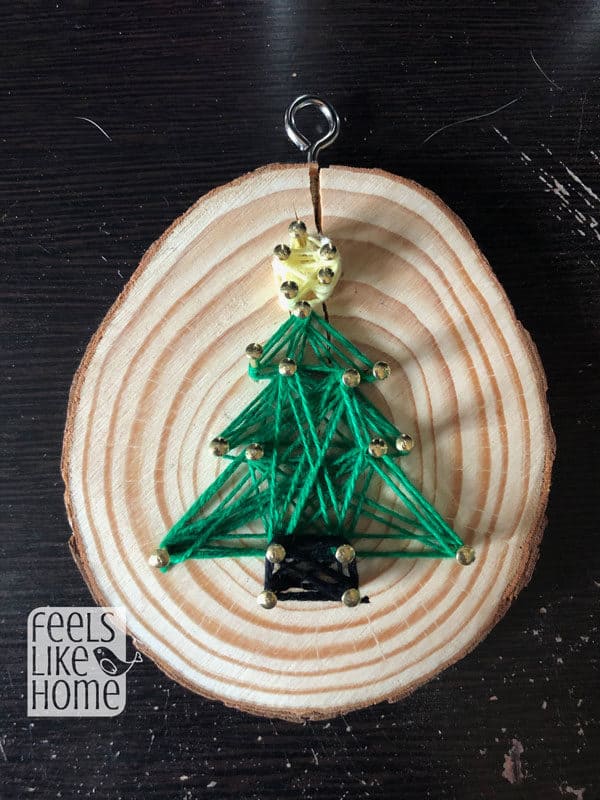
Here is the tree with the hot glue and smaller eye.
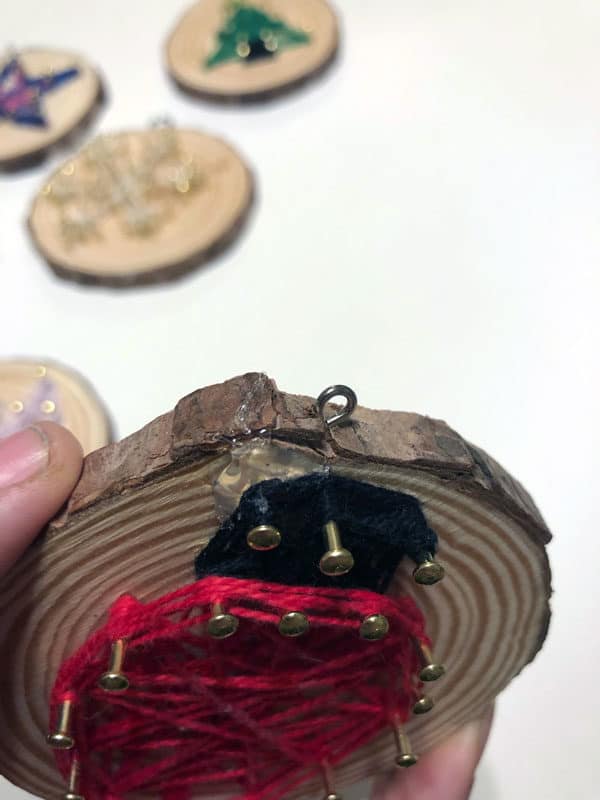
Another faux pas to avoid: I made the edge of my Christmas light too close to the edge of the wood slice and split the wood there. Again, I filled the split with hot glue, and I think this one will hold, but it was annoying. Try to stay away from the edges if you can.
Here are all of our wood slice Christmas ornaments. I made the tree, light, and snowflake. Grace made the star, and Allie made the angel (though I did all the hammering for her, at her request).
I am participating in the Kid-Made Christmas Ornament project again this year, and this Christmas ornament was inspired by The Carpenter's Gift, a beautiful story about love, and the good that can be done by donating your time and property. It starts in the Great Depression and moves forward, talking about how old Christmas trees can be used by Habitat for Humanity to build new homes for real people. It's a great story.

If you're looking for a more general string art tutorial for beginners, check that out over here.
If you're looking for more Christmas books, check out my mega list of 101 Christmas Books for Kids.
If you're looking for more kid-made ornaments, check out my huge list of the 40+ kid-made Christmas ornaments that we've made.
Source: https://feelslikehomeblog.com/simple-easy-christmas-string-art-ornaments-for-kids-adults/